Incorporating DIY Wine Storage Into Kitchen Remodels
Remodeling a kitchen is an ideal time to set up wine storage that feels intentional and built-in. A thoughtful approach to wine storage in kitchen remodels can result in both practical and aesthetic benefits—keeping bottles close for everyday enjoyment while adding sophistication to the overall design.
By artfully deploying DIY wine storage solutions, homeowners, designers, and contractors can create spaces that look integrated and protect wine properly, all without requiring a full-scale—and potentially much more expensive—cellar project.
The right wine racks, chosen with care, turn unused nooks or open walls into purposeful features that transform the kitchen into a place for both cooking and entertaining. Let’s explore this topic further.

Start With the Layout
The first step is deciding where wine should live in relation to the working kitchen. Placement makes a huge difference when it comes to both convenience and preservation:
- Avoid hot zones: Ranges, ovens, dishwashers, and windows with direct sun are unsuitable for bottles.
- Seek calm zones: Look for stable, cooler areas such as pantry walls, island ends, or the niche beside tall cabinets.
-
Work with your floor plan:
- U-shaped kitchens: Use a slim vertical rack at the open end for easy access.
- L-shaped kitchens: A cabinet wine rack kitchen insert fits neatly on the shorter run.
- Galley kitchens: A wall-mounted wine rack along a free wall creates storage without stealing walkway width.
- Island kitchens: Add storage at one or both ends of the island to keep bottles close but clear of prep zones.
Considering layout early ensures bottles are both accessible and protected, while leaving traffic patterns and appliance doors unobstructed.
Sizing for the Wine Collection
A wine collection usually grows and changes over time, so sizing the storage accordingly is critical. Think in terms of both daily use and special occasions:
- Daily drinkers vs. long-term bottles: Separate everyday wines from those you plan to age.
- Weekly pull rate: Estimate how many bottles you open in a normal week and plan capacity accordingly.
- Entertaining buffer: Add extra space for holidays, gatherings, and other special days.
- Bottle formats: Different wine regions use varying bottle shapes and sizes, so choose storage that accommodates the types of wines you normally buy.
By planning capacity with growth in mind, you avoid crowding and ensure your kitchen cupboard wine rack or DIY wine wall rack remains useful for years.

Exploring DIY Wine Rack Types
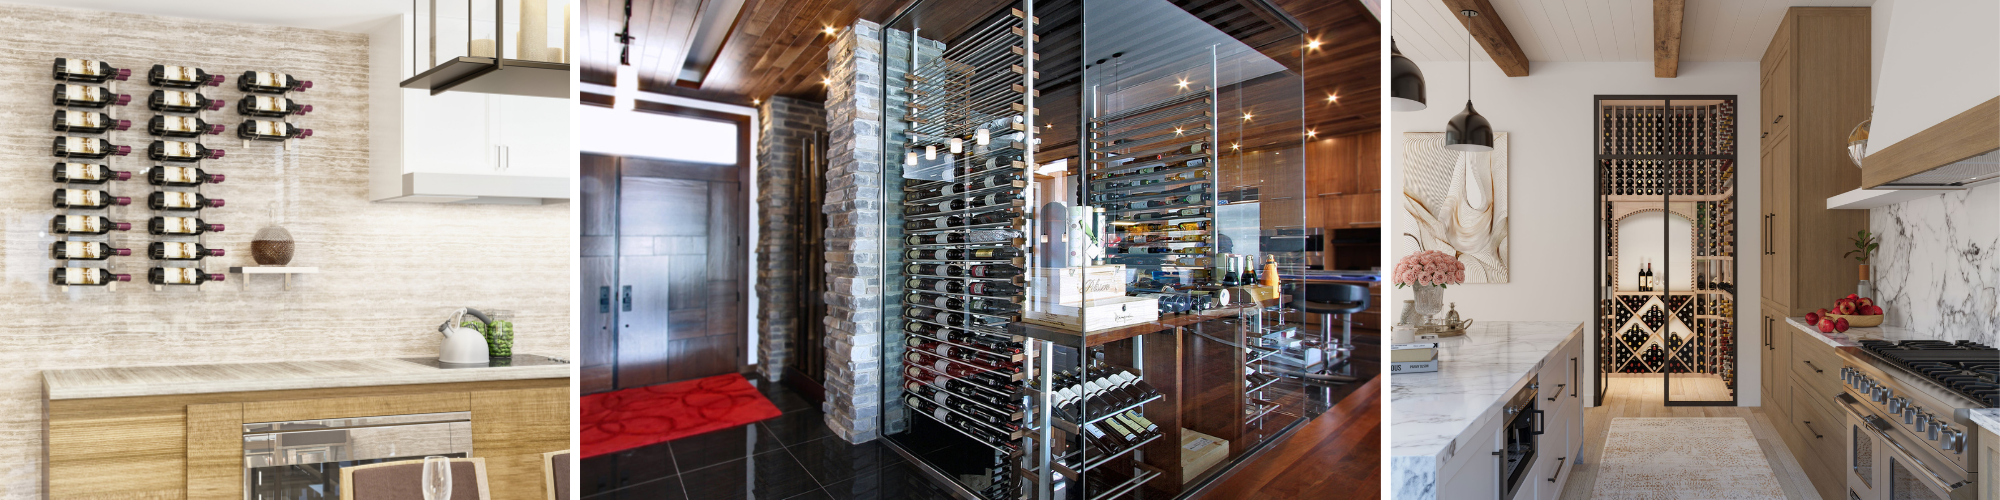
There are many kitchen wine storage ideas to suit different layouts and styles. At Wine Racks America, you have a number of attractive options, including:
- Floating wine shelves: Minimalist wine displays that work beautifully over a bar nook or coffee station.
- Wine cubes & bins: Compact, stackable units that hold up to 96 bottles, ideal for bulk purchases or pantry installations.
- Shelf-style wine racks: Versatile systems that accommodate bottles and cases, offering storage up to 144 bottles per unit.
- Floor-to-ceiling posts: Maximize vertical space and define open-plan kitchens by flanking an island or wall.
- InstaCellar™ DIY wood racks: Stackable, easy-to-assemble modules that install cleanly during a remodel and expand as your wine collection grows.
- GrandCellar™ full-depth modular racks: DIY wine rack plans that combine columns, cubes, drawers, and display rows in premium woods like White Oak, Walnut or Sapele Mahogany.
From compact DIY wine rack options to larger, furniture-grade systems, each type can be matched to both the homeowner’s lifestyle and the kitchen’s overall design.
Climate Considerations
Wine preservation depends on stable conditions.
- Short-term storage: Keep bottles in cool, dark areas of the kitchen away from appliances or direct light.
- Long-term storage: Target 55–58°F with 60–70% relative humidity for proper aging.
-
Planning a conditioned niche:
- Install insulation and a continuous vapor barrier.
- Use a sealed entry or door.
- Select a properly sized wine cellar cooling unit.
Kitchens come with extra challenges beyond just heat and light. Cooking odors, grease, and steam can cling to labels and, in open storage, may even seep past corks over time. Position racks away from stovetops and use cabinetry or enclosed niches for wines intended to age gracefully.
Even if you’re not ready to add cooling immediately, leaving space during a remodel allows you to upgrade later and turn a pantry into a high-quality kitchen wine cellar.
We supply a full range of wine cellar cooling units and can guide sizing. Installation should be performed by your contractor or HVAC professional.
Practical Placement Details
Once you’ve chosen your preferred wine racks and storage style, fine-tune the details so everything fits seamlessly into the remodel. A few considerations make a big difference:
- Bottle depth: Allow for 12–13 inches of depth for standard bottles, plus space to pull bottles out comfortably.
- Clearances: Confirm that doors, drawers, and walkways won’t hit racks or displays.
- Anchoring: Tall installations like DIY wine wall racks or floor-to-ceiling posts should be secured into studs or blocking for safety.
- Vibration sources: Avoid dishwashers, garbage disposals, ice makers, and high-traffic paths—persistent vibration can affect aging.
- Safety: Think about child access and pet activity. In some areas, seismic anchoring is an important consideration as well.
When exploring wine storage ideas for kitchens, always ensure your racks and displays don’t just look beautiful but also provide an accessible solution that will not disrupt everyday use of the space.

Installation With a Remodel
DIY wine storage can be straightforward, but planning installation properly prevents rework. Homeowners can usually manage assembly and light anchoring, while contractors take on the technical elements.
- DIY-friendly tasks: Assembling modular wine racks, attaching wall-mounted wine racks or floating wine shelves, and installing under-cabinet stemware holders.
- Contractor tasks: Electrical for lighting circuits, HVAC for cooling units, and carpentry for enclosing a conditioned niche.
- Remodel sequence: Framing and rough-ins come first, followed by flooring and cabinetry. Install your wine racks after cabinetry is set, and only commission cooling once doors and seals are complete.
Maintenance Concerns
Like any part of a remodel, wine storage benefits from a little ongoing care:
- Dust control: Wipe down open racks and floating wine shelves periodically to keep bottles and labels pristine.
- Conditioned storage checks: For cooled niches or kitchen wine cellar spaces, it’s best to inspect seals, change filters, and confirm consistent temperature/humidity a few times a year.
- Hardware: Tighten fasteners annually, especially for wall-mounted wine racks or taller installations.

Elevate Your Kitchen With Wine Racks America
With our modular DIY wine racks—including InstaCellar™ and GrandCellar™—you can create a kitchen wine cellar experience that feels both refined and practical.
We deliver designs for review in 48 hours, build and ship in 4–6 weeks, provide free shipping on wood racks, and manufacture all products in the USA. We go the extra mile to ensure your kitchen wine storage ideas can move from plan to installation without delay.
Featured product